The Timeline
A TimeStory document consists of events assigned to dates on a horizontal timeline, with the past to the left and the future to the right. There isn’t a “start” or “end” to a timeline; regardless of how large your document already is, you can always scroll to any date you want and create events there.
This means that you don’t start by setting a date range, like in many other apps. You start by simply going to a date and beginning your work. When it comes time to view or export your timeline, any unused space is simply ignored.
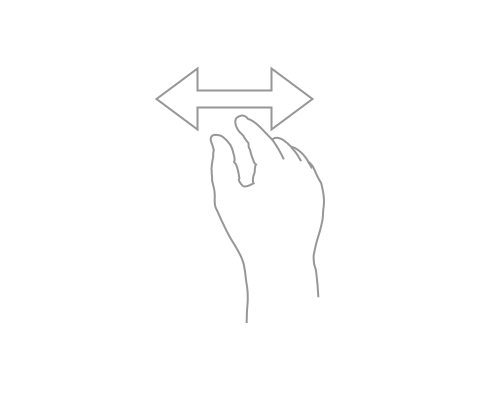
Use simple gestures to get around and adjust your view:
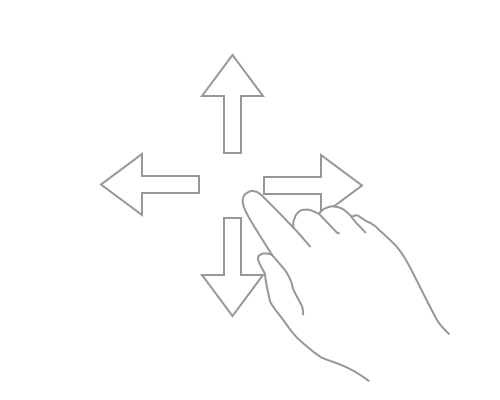 |
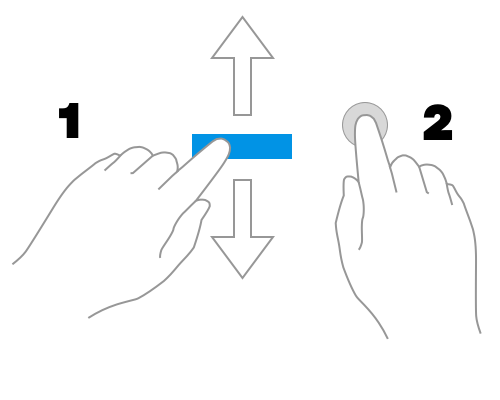
Scroll around the timeline by dragging with one or two fingers. One-finger drags can also move items around in Edit mode; two-finger drags can’t. |
 |
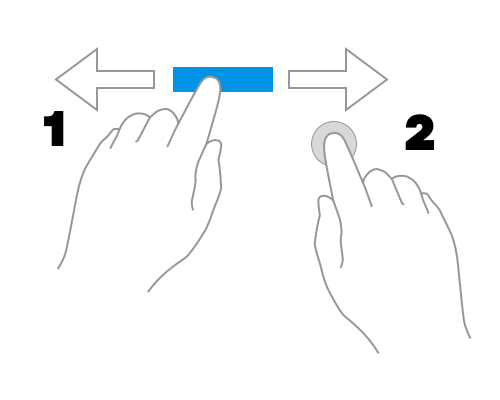
Adjust the time scale by pinching horizontally. This changes the visible time range and the granularity of the timeline header, while keeping the size of images, event graphics, and font sizes. |
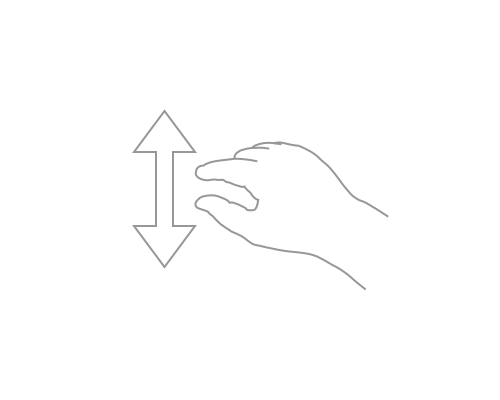 |
Zoom in or out by pinching vertically. This magnifies every element in the timeline—text, images, section headers, and events. |
The  menu also contains quick links to scroll to the earliest and latest dates in the timeline, to today’s date, or to any other date you choose.
View and Edit Modes
An open timeline is always in either view mode or edit mode.
View mode is meant for browsing, reading, or presenting a timeline. You can change timescales, units, and zoom levels, and tap on any item to view its details.
Edit mode is used to create or edit a timeline. You can drag events, images, and sections around, you can modify the values shown in the Inspector, and a tap on any item brings up a menu full of editing actions.
Example timelines always open in view mode; other timelines remember what mode you last used. Switch between modes from within the menu. On larger devices, like iPad, there will also be a Viewing indicator on the top bar when in view mode; you can also tap there to switch modes.
Common Controls
These tools appear as buttons on the toolbar, when possible; on smaller screens, like iPhone, find them in the menu.

- Undo, when there are editing actions to undo.

- Redo, when you've used Undo, and there's an undone action to redo.

- Shows or hides the event filter. This lets you filter your view by title text or other criteria.
- A menu of editing, navigation, and other actions which either don't fit on the toolbar or are less-frequently used.

- Shows or hides the Inspector, which lets you view and change all the properties of the selected item or of the timeline itself.

- Pops up the details for the selected event, section, or image.
Editing Tools
Use these tools plus taps and drags to edit the contents of your timeline. These tools may be grouped into a menu under  when there isn’t enough space to show them separately.
On an Apple Pencil (2nd generation), you can also double-tap on the side of the pencil to cycle through these tools.

- New Span Event: Drag across the timeline to draw a span event (with start and end dates).

- New Point Event: Tap on the timeline to place a point event (with a single date).

- Select Events: Draw a line around the events you want to select, or tap one event at a time to select/deselect it.

- Copy Style: When you have an item selected, activate this tool, then tap on any other item to replicate its colors, fonts, and other applicable styling.

- Nudge Events: Shows a separate tool which lets you push the selected event one day or row at a time, when dragging isn’t precise enough.

- Resize Header Columns: Adds vertical divider lines to the left-side section header area, allowing you to resize them horizontally.
Editing Gestures
In edit mode, you can directly move things around by dragging on the screen.
 |
To drag an event, section, or image, first make sure it's selected, then drag it with one finger. |
 |
To drag an event vertically without accidentally changing its date range, first start to drag the event up or down, then, while dragging, touch and hold the screen (anywhere) with another finger. As long as you've moved mostly vertically, the event will snap back to its original date range and it will now only move vertically. You can remove the second finger once this mode is triggered. |
 |
To drag an event horizontally without accidentally changing its row, do the same thing, but start by dragging right or left. |
The Inspector
The Inspector is the central place to view and change the configuration and style of your timeline. If you have events, sections, or images selected, it shows their properties, and if you have nothing selected, it shows general properties of the timeline itself.
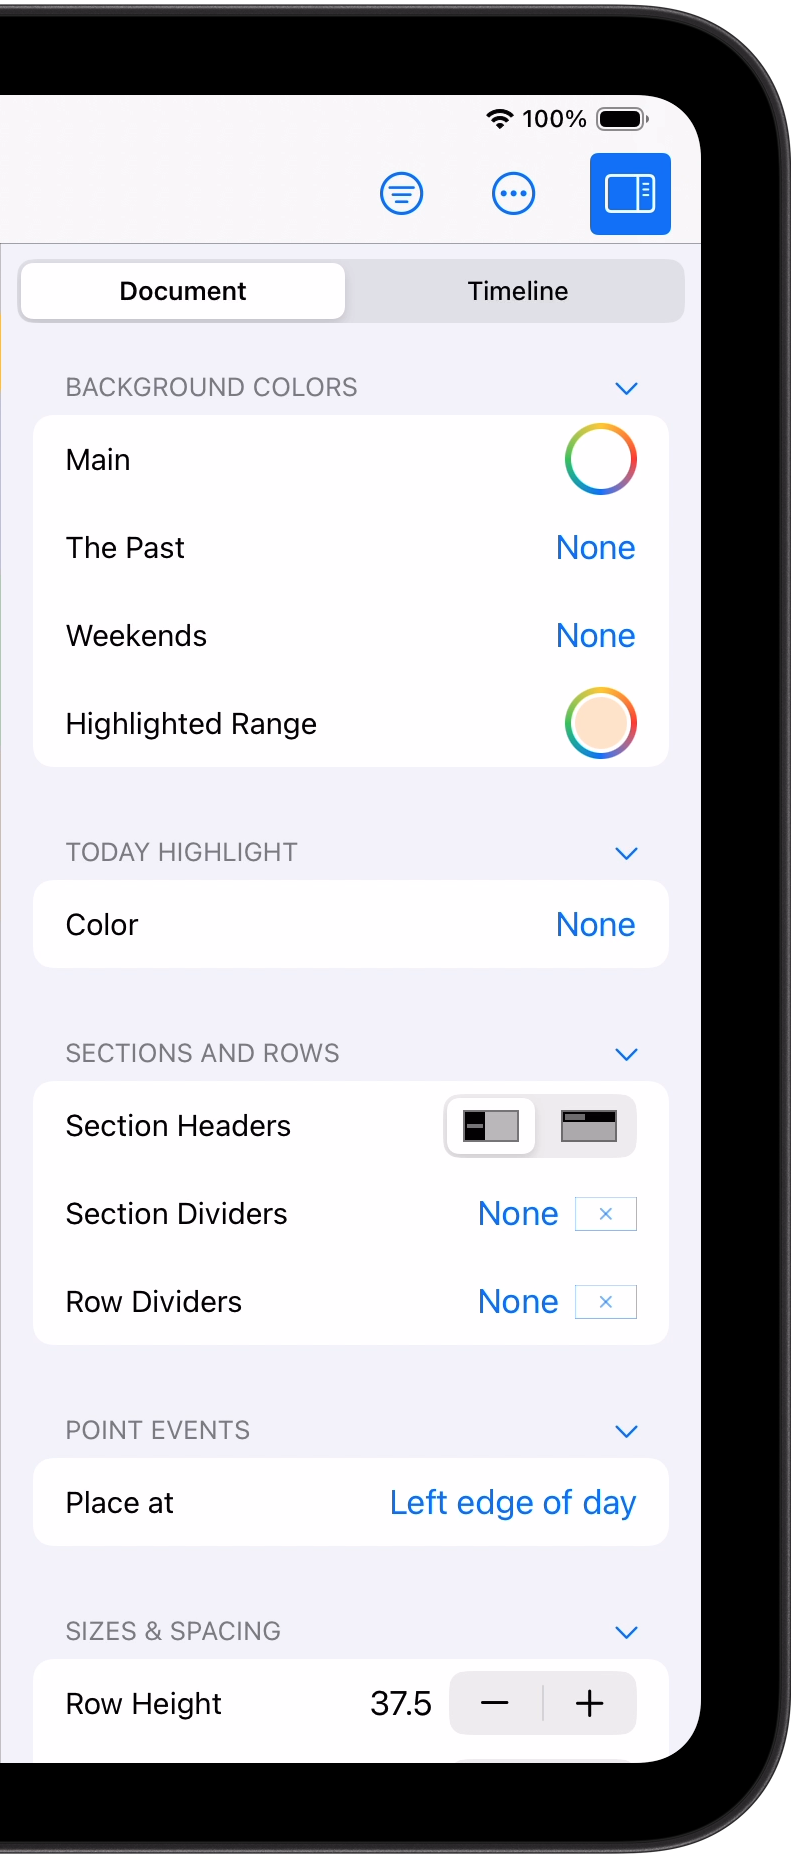
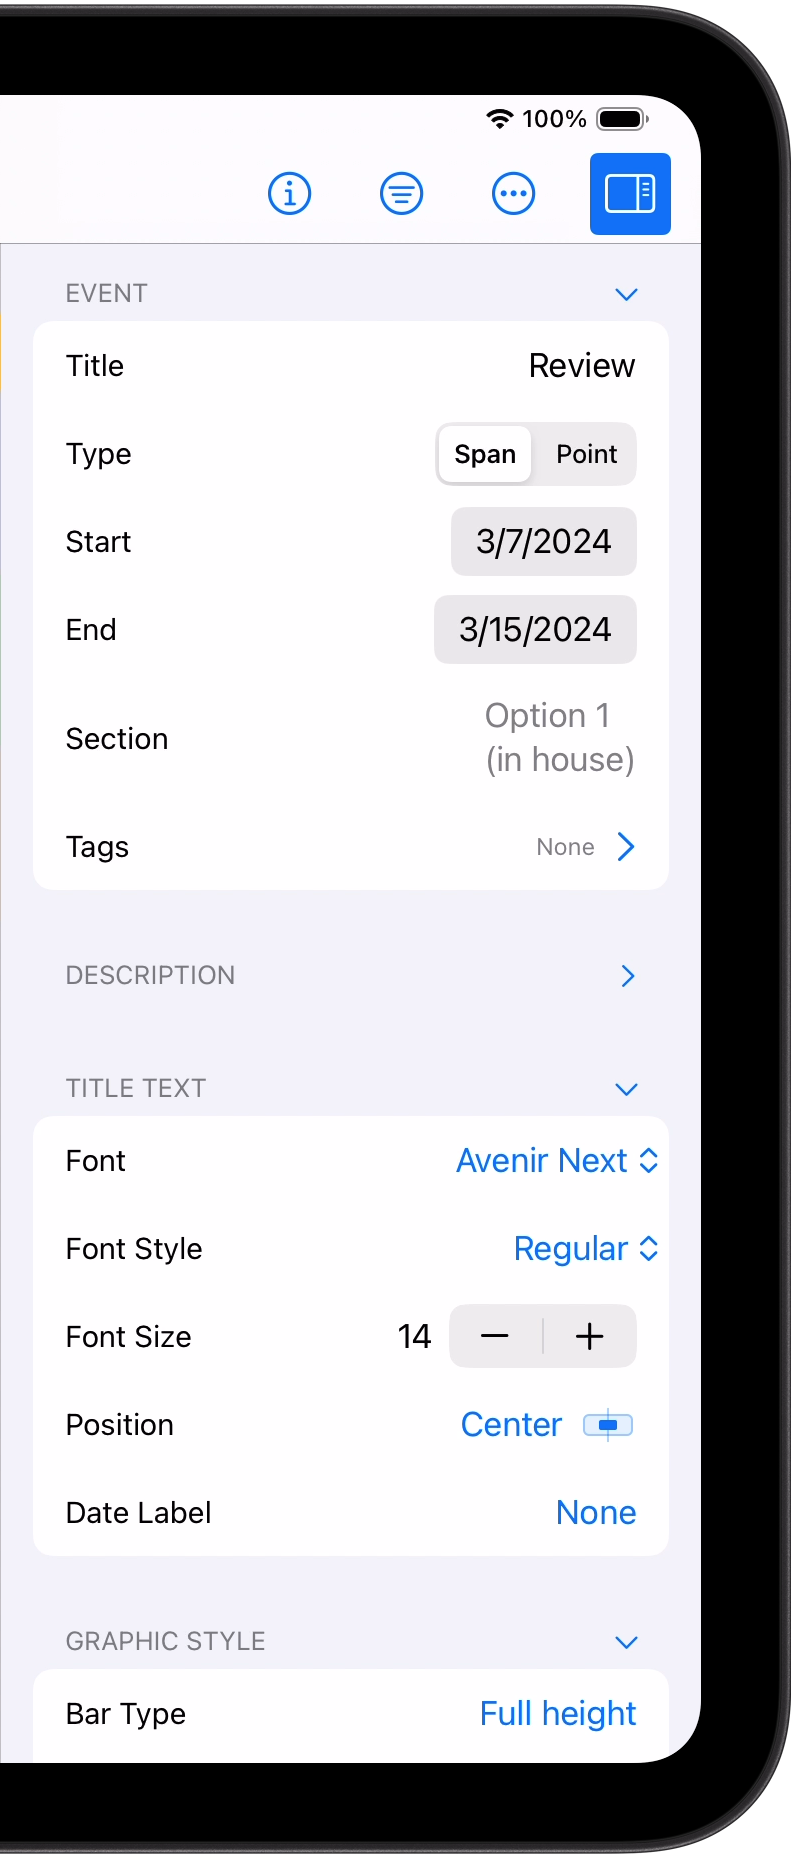
Some values in the Inspector, such as an event's date range or title, may also be changed directly in the timeline; some other values, such as font selections, can only be seen and edited here. The Inspector is available in both View Mode and Edit Mode, although you can only change most values in Edit Mode.
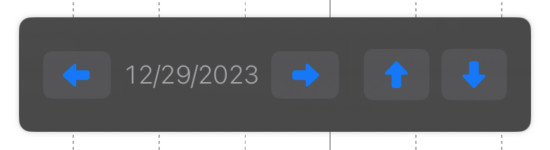
The Nudge Tool
This tool is available whenever you have at least one event selected, and makes it easier to precisely move events around on the timeline when your current timescale or zoom level makes it difficult to drag them directly. Enable this tool by tapping the ![]() button in the toolbar; it floats at the bottom of your screen.
button in the toolbar; it floats at the bottom of your screen.
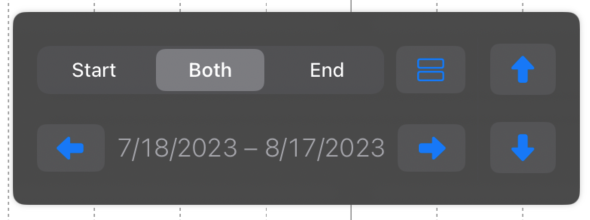
Using the horizontal arrow buttons, you can push the event one day forward or back; choose Start or End to push just that end of the event. Using the vertical arrow buttons, you can push the event one row up or down, space permitting. Tap on the button with two rectangles to choose whether TimeStory should avoid span-event overlaps or allow them as you push the event around.
If you have a point event selected, the tool is simpler. There is no start or end, so you can only nudge the entire event, and point events always allow overlap, so there's no mode selection.
The Event Filter
Open or close the Event Filter by tapping the
button in the toolbar. The Event Filter lets you type in text and other search criteria, and hides any events which don't match, shrinking the timeline as you type.
For example, type party to hide all events in the timeline which don't have the word “party” in them. Type birthday party to hide all events which don't have both of those words in them; it doesn't matter if the two words are together or not, so both “Birthday Party” and “Party for our birthday” will match.
Other available search criteria, which you can freely mix in your filter strings:
- "multiple words"
- Place quotes around multiple words to only match them in that sequence, exactly.
- #tagname or #[tag name]
- Matches events whose Tags contain “tagname” or “tag name”, respectively. The brackets are required only if the tag name contains a space.
- is:span or is:point
- Only matches span or point events, respectively.
- in: section
- Matches events in sections matching “section”. You can use a single word, to search section titles, or quoted text, to look for multi-word phrases, or #tagname, to search sections by tag.
- < date
- Matches any event which starts before the given date.
- <= date
- Matches any event which starts on or before the given date.
- > date
- Matches any event which ends after the given date.
- >= date
- Matches any event which ends on or after the given date.
Finally, you can build complex filters by combining simpler ones. Just type two criteria next to require both. Separate two criteria with a | (vertical bar) to require either. Type a ~ (tilde) before a criterion to invert it; that is, match the opposite. Group criteria together with parentheses. Putting these all together, ~deliver (pizza | sandwiches) will match events which do not contain the word “deliver”, but do contain either of the words “pizza” or “sandwiches”.