A TimeStory document consists of events assigned to dates on a horizontal timeline, with the past to the left and the future to the right. Unlike in many other apps, the blank “canvas” you see when creating a new timeline document doesn’t require you to set a date range first. You can just pick a date and start working (e.g. to create or update events).
Creating Your First Timeline
Create a new empty timeline with File→New. You can also use File→New from Template and choose from a few predefined templates; later on, you can create your own templates to reuse styles and content.
You can add any number of events to a timeline. There are two types of events:
- Span events, representing timespans, tasks, durations, or anything with a start and end date
- Point events, representing milestones, calendar dates, or anything represented by a single date without duration
Click the New Span Event  or New Point Event
  button in the toolbar, then move your pointer down over the blank timeline. A new event will appear and follow your pointer; click to place it. For span events, you can also click and drag to set the event’s start and duration in one gesture. (These actions also appear in the main menu, under Events, and have quick keyboard shortcuts of E and P.)
Once an event has been placed, you can grab it and drag it around with your pointer. You can also drag a span event’s start or end date independently. Double-click an event to start editing its title in place.
TimeStory provides many features for manipulating, editing, or styling events, as well as designing timeline headers. There are also other options to enter events, including Quick Event Entry for typing them in, or Importing from CSV to bring them in from external sources.
Main Controls
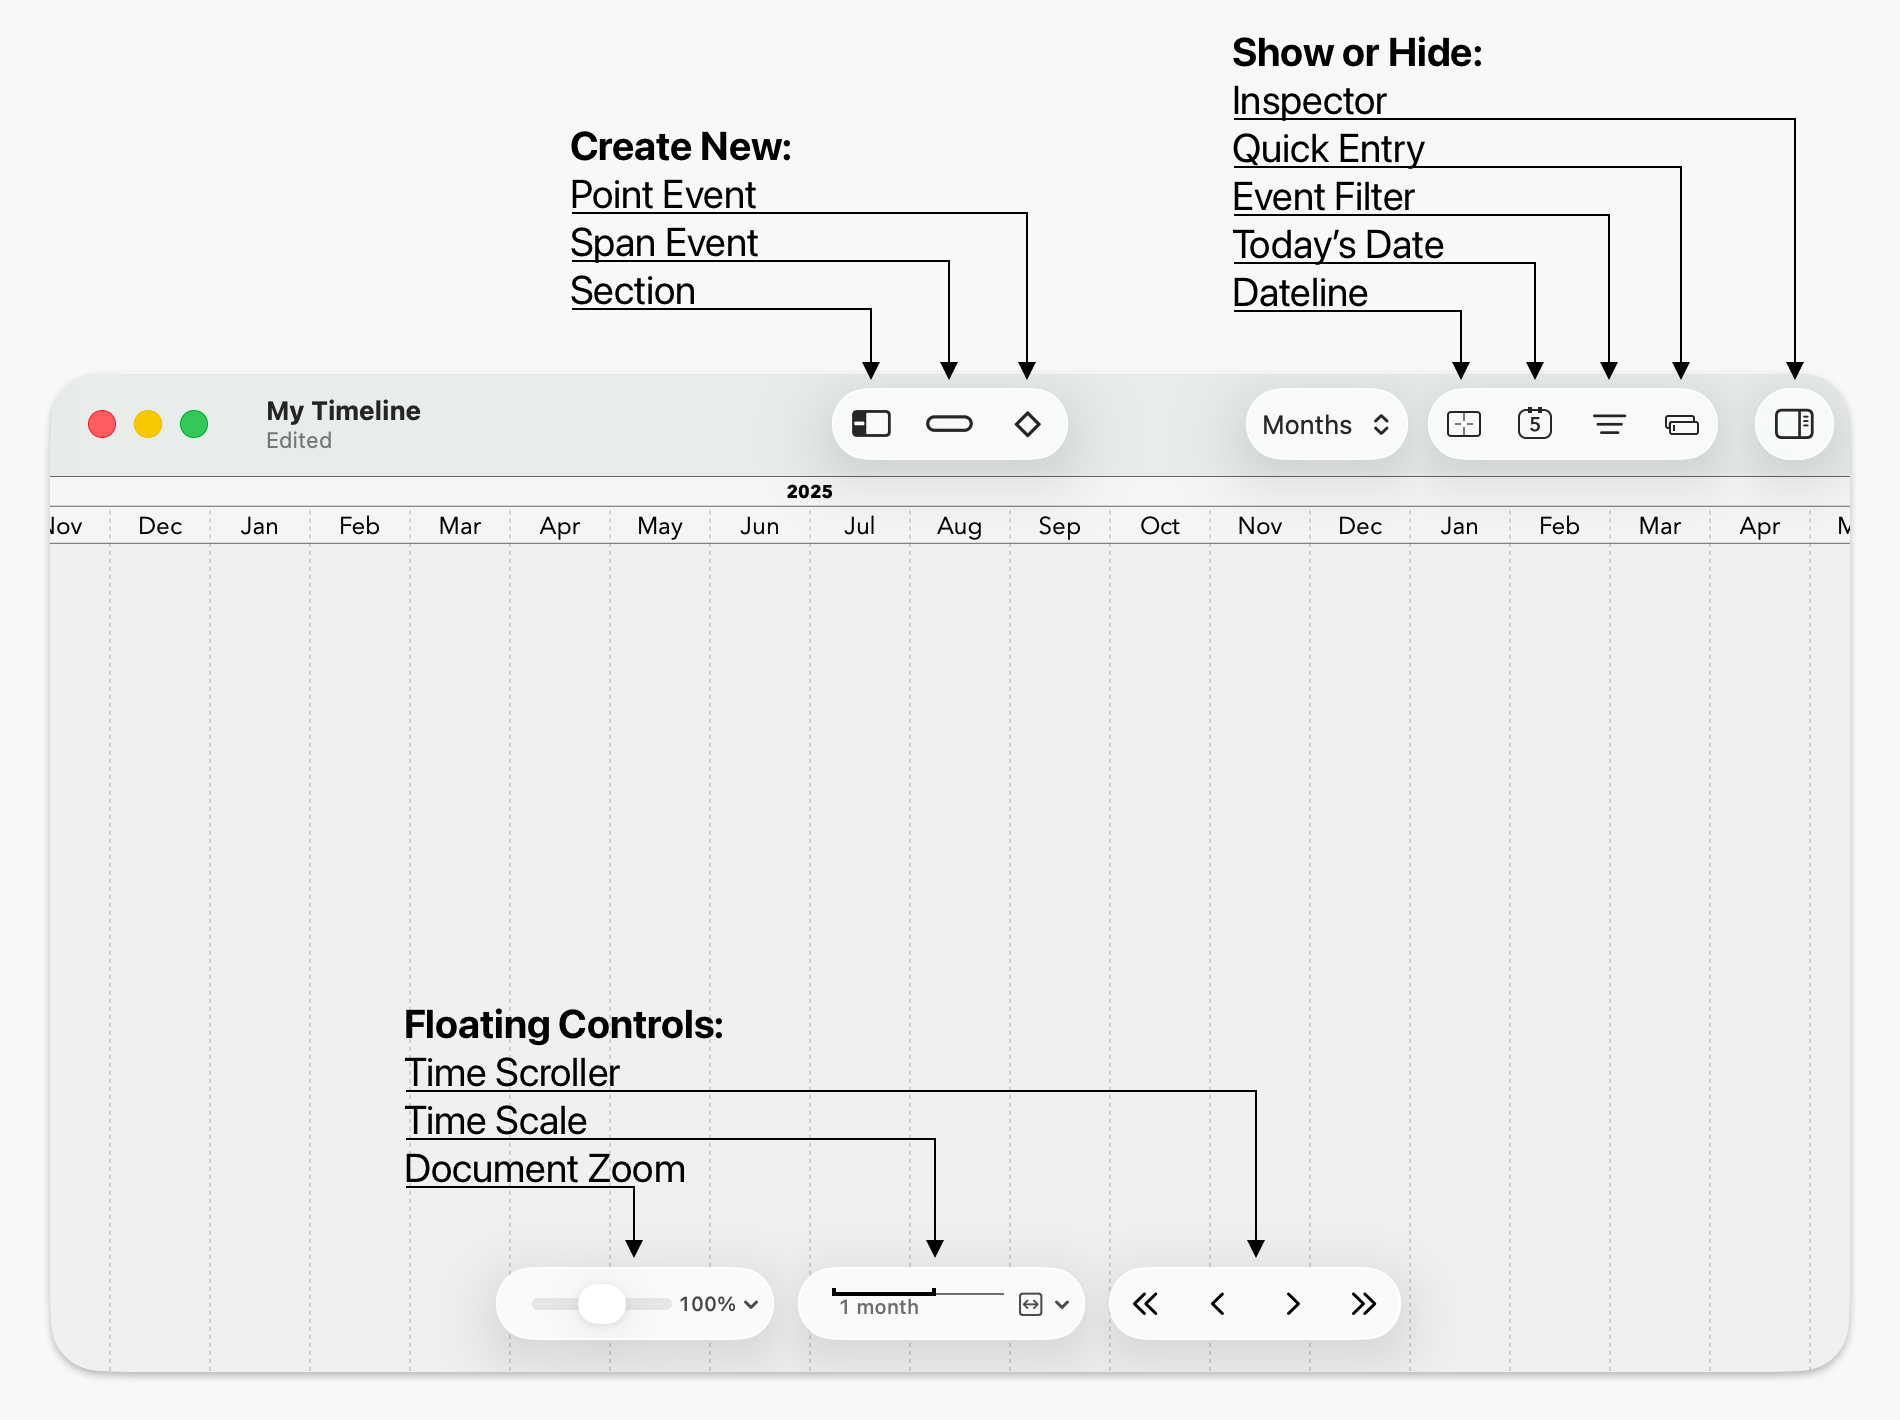
The Toolbar (at the top)
- New Point Event: Click on the timeline canvas to place a point event (with a single date).
- New Span Event: Drag across the timeline to draw a span event (with start and end dates).
 or
or 
- New Section, for grouping events across the timeline. Refer to Structuring Timelines with Sections for details.

- Show/Hide the Dateline: A vertical line that tracks your pointer, showing exactly what date your pointer is on.

- Show/Hide the Today Highlighter.

- Show/Hide the Events Filter.

- Show/Hide the Quick Entry Form.

- Show/Hide the Inspector.
The Floating Controls (at the bottom)
- Document Zoom slider: Drag along the slider to zoom in or out on the timeline document.
- Time Scale: Drag along the time scale to adjust the time scale up or down.
- Time Scroller: Click on the left or right arrows to scroll along the timeline.
The Inspector
The Inspector is the central place to view and change the configuration and style of your timeline. If you have events, sections, or images selected, it shows their properties, and if you have nothing selected, it shows general properties of the timeline itself.
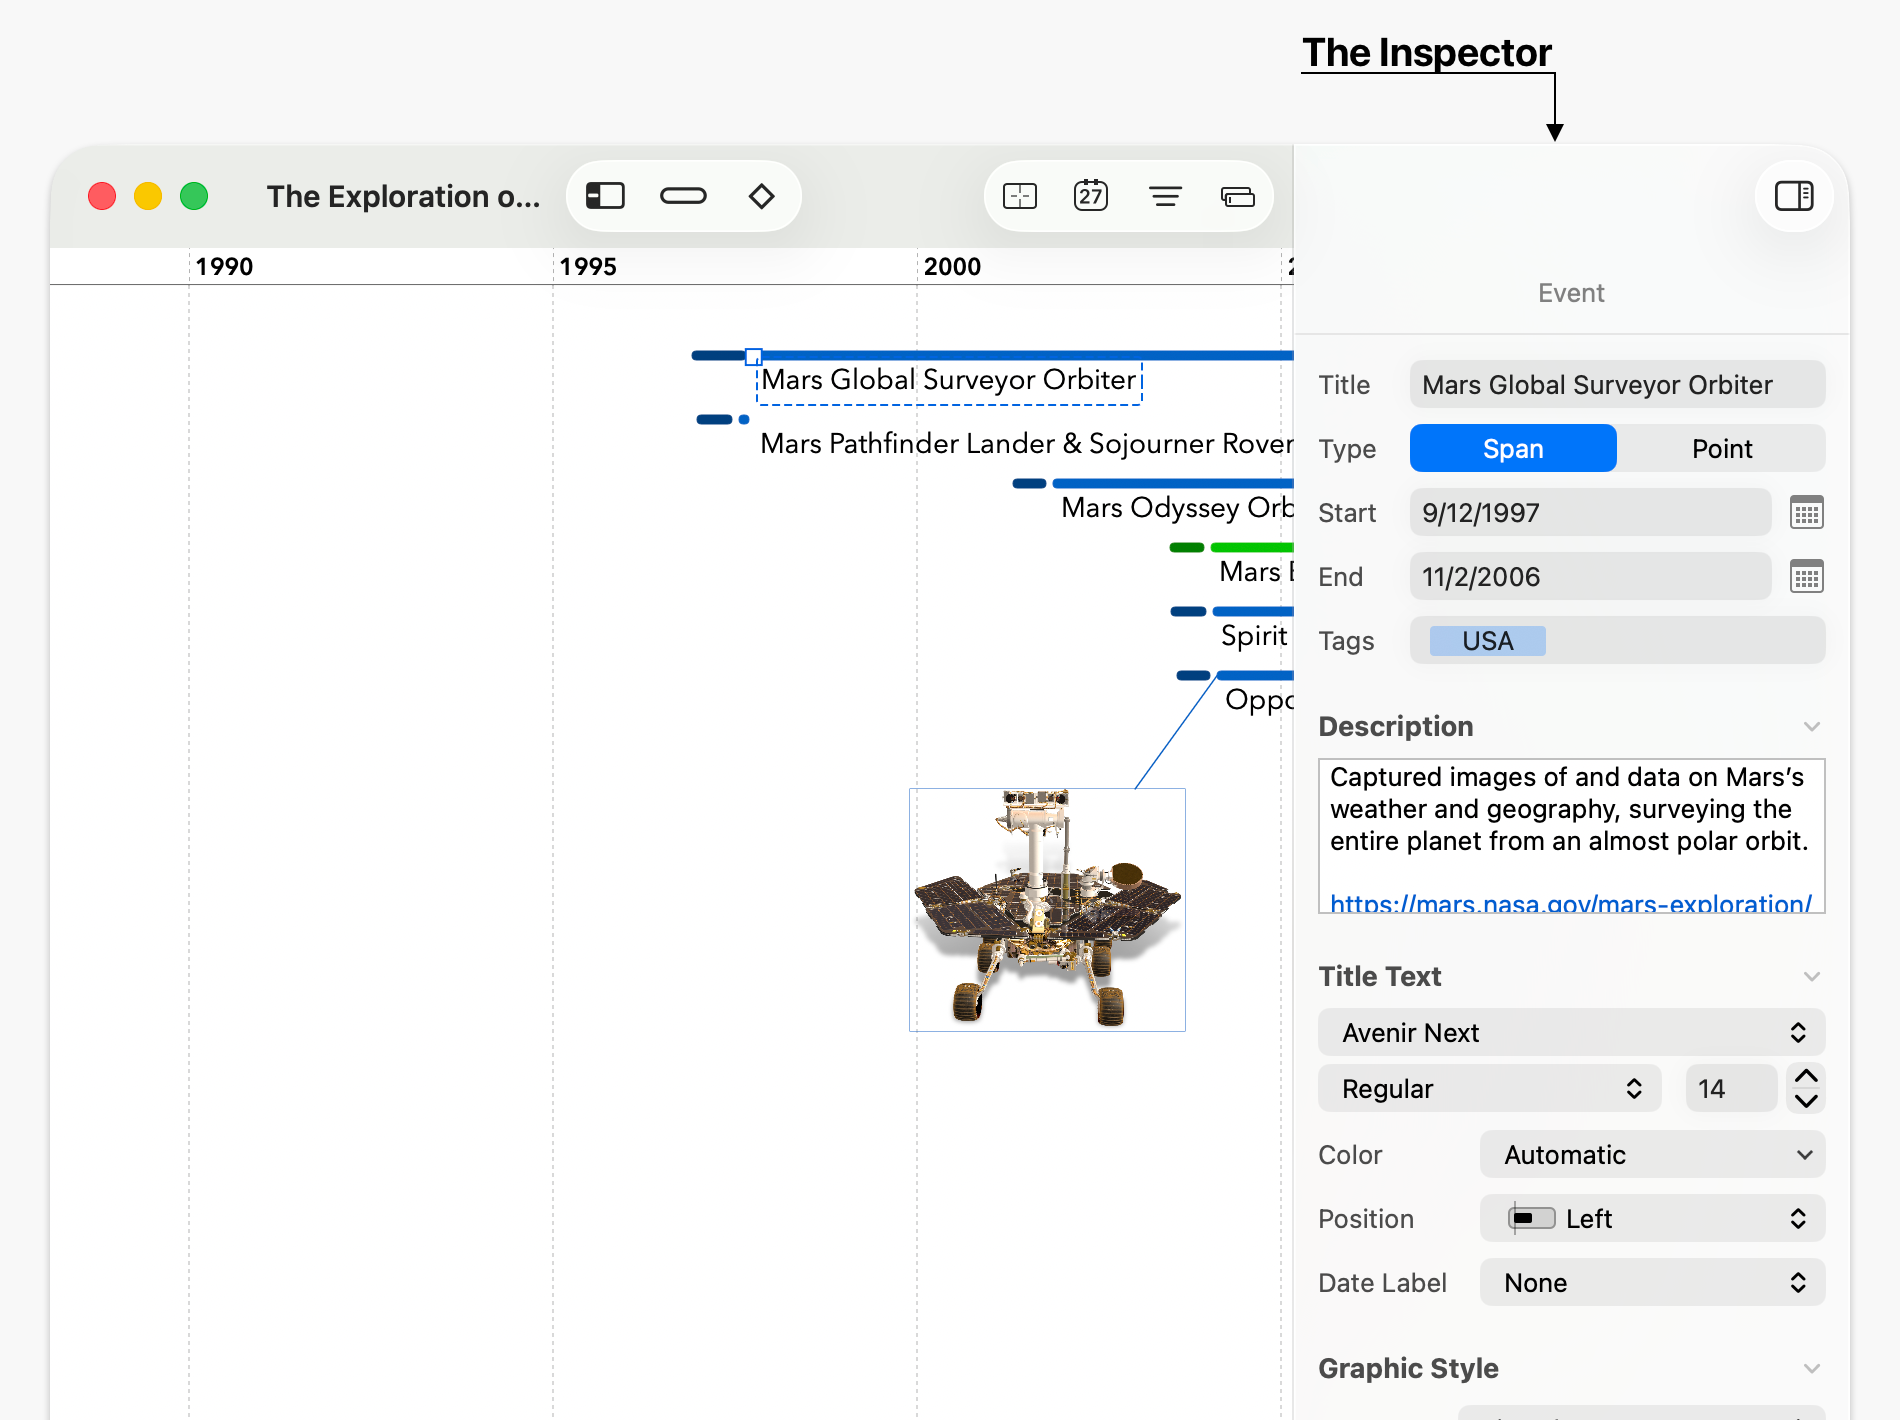
Show or hide the Inspector by clicking on the control in the upper right corner of the window (unless you’ve customized your toolbar), or with the keyboard shortcut Shift+Command+I. Resize the Inspector by dragging its left edge.
The Description field, available in the Inspector for events and sections, can be “popped out” into a separate floating window. This makes it much easier to work with large amounts of text. Click the pop-out button to the right of the “Description” title to pop it out; close that window (or click on the “pop-in” button that took its place) to move it back into the Inspector.